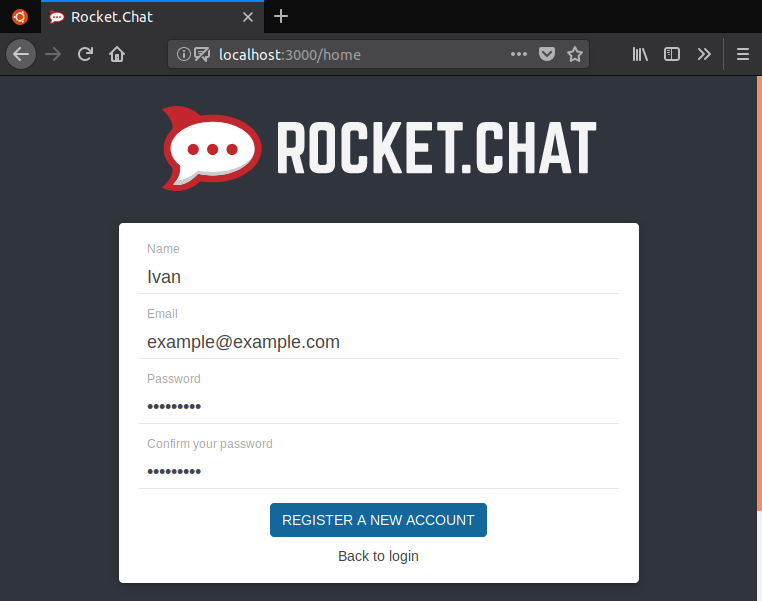
First, you’ll have to create an account. The first account created on the server will automatically become an admin, which will allow you to configure the server.
Click on Register a new account. You’ll be shown a screen where you must enter your name, email and password.
The Name field on this page is not your username!
Your username will be chosen on the next page. The Name field on this page should be your actual name, so your team members can identify you.

After registering, you will be logged in automatically. By default there will be one channel (#general), and there should be a message showing that you joined. There should be badge beside your name, indicating that you’re an admin, as shown below:
In the left sidebar, there is a list of channels. You can switch to a channel by clicking on it. A channel is essentially a seperate chat room made for a specific topic with different sets of people.
Creating a channel
A channel may be created by clicking on the plus sign beside the search bar. Channels may be private and require an invite, or public for anyone in your team to join. Channel names may only include lowercase letters, numbers and dashes.
Sending direct messages
You may send direct messages to team members by opening the member list (located on the right sidebar), clicking on someone’s name and clicking on the Conversation button. Past direct messages will appear on the left sidebar, under the list of channels.
Messages
Messages can be sent (quite intuitively) by typing in the chatbar and pressing enter. You may add attachments (files, video and audio), emoji, and apply basic formatting.
All messages have a menu that can be accessed by hovering over them and clicking on the series of dots that appear over it at the top-right corner. If you sent the message (or you have the proper permissions), you can edit or delete it. You can also star a message to save it for later, or, with the proper permissions, pin it to the channel to save it for everyone. Stars and pins can be accessed from the right sidebar.
Other features
From the right sidebar, you can also change notification preferences and see the file list for a channel. If you click on your name at the top-left, you will open a menu where you can change your status (online, away, etc), change your account settings, or (if you’re an admin), change server administration settings.
That’s a quick RocketChat primer. Now, let’s move on to server configuration!


